
I recently took the plunge and purchased my first IPhone! I’m now 2 weeks in, and I love it!! However, I couldn’t find a cute case that I LOVED just as much as the phone? So I was in a bind! I thought, “well creative self. what will we do about this? -MAKE OUR OWN!”. not a bad Idea, right? I searched for some DIY Phone Case Tutorial. Finally, when I was surer about what I’m going to do. Made sure to get all the materials.
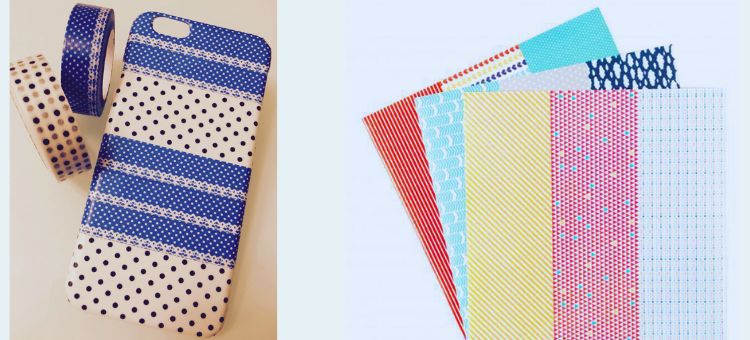
Who doesn’t love washi tape? LET – ALONE – Washi SHEETS!! Holy Cow I was so excited!
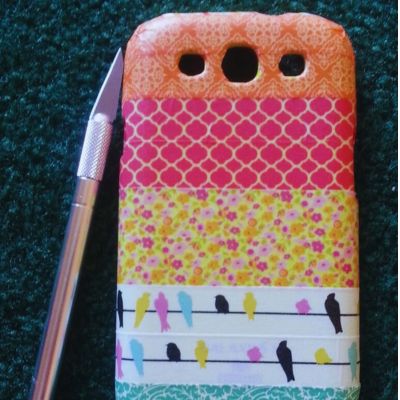
So, I picked out this sweet floral, because. you know me. Florals are my obsession lately.
The supplies list for this project is Simple with a capital S! And in total costs less than HALF the price of a store-bought designer case!
Supplies:
Plain White CHEAP phone case (I found mine at the Dollar Tree)
Washi Sheets of Choice
Clear coat enamel spray
Razor blade
Instructions:
First up your going to trace 1/2 inch around the outside of your phone case ON THE BACK of your washi sheet. Pay attention to the spot that you are tracing, is it a part of the pattern you want? Cut that out.
Once you have that cut out the template, you can peal off the back of the washi sheet. Then place the phone case onto the sticky side, pressing firmly down.
Fold the washi sheet over the sides and smooth out any wrinkles. Allow your washi sheet to fold over the inside edges. Be sure to smooth out the corners.
Use the razor to cut a line in the center of the “holes” where your BUTTONS, plugs, camera etc will be. Do NOT cut to the edges. You will want to just create a small slice down the center of the holes. A shape like this.. |————–| that way you can fold the edges to the inside of the case, again wrapping it around the edges.
Once you are happy with the way that it is laying on the phone, you are almost done! Place your lovely washi covered phone case down onto newspaper face down exposing the inside. Spray. Allow to dry.
Flip onto the other side and spray the clear coat onto the sides and outside. Allow to dry.
Sometimes a few coats are necessary!
Isn’t this adorable?! I love it!! No one would know that it seriously only cost less than $20! Say Wha??? Yep! I said it!
I love the clean lines, I love the sleek look of it, and I LOVE that it is different than what anyone else would have!
Every time I pull out my phone, I get a little giddy inside!! I’m reminded that I have something to be proud. I’m a creative momma! It’s in the little things! hehe! I hope you will find this DIY Phone Case Tutorial helpful to make yourself proud.